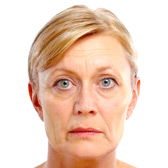
by M. Cameron | Oct 15, 2013 | 2.1 Acne Treatment
My Cyst Removal Experience at Q Esthetics
I would like to tell you about an experience I had at Q Esthetics in July, but first a little background.
What started 12 years ago as a clogged pore, turned into a very ugly,very large, and most annoying cyst on my face. Over the years,I have tried everything to get rid of it. Estheticians have poked and prodded at it; – their efforts always leaving me with huge red marks, sometimes for as long as two weeks. I tried natural remedies, I tried talking to it and willing it away, but it just kept on growing. Before choosing the dermatologist route, I walked into the Q Esthetics Laser Clinic on Eglington Avenue and booked a consultation with Nancy Qiu. She explained to me that it was a cyst, probably an infected one, and I made an appointment to have it removed the following week.
And here is where the magic part of my note begins. Nancy did not freeze my face. She simply made a razor thin slit, pressed very hard, and in less than one minute, she had successfully removed one cyst and several smaller ones. I left with a small bandage on my face and instructions to care for the spot over the next few days. In three days, there was not a mark on my face! Nancy had taken a photo of my cyst before she removed it and so I went back the following week to show her the results and asked her to take another DATE stamped picture because no one would ever believe it. To me it is still absolutely unbelievable what she did and I could not be more pleased. I have recommended her services to all my friends and wanted to let you know, as well, what a happy client I am.
On a completely different note, I have been in the sales and service business my entire career and can’t help but notice when I walk into a professional office and am greeted by a smiling receptionist and my appointment times are kept. The Eglington Office gets five stars from me and I am a hard marker!
by Q Pro-team | Sep 16, 2013 | 1.1 Resources & Tips
What You Need to Know About Fungal Nail Infections
Nail fungus is unsightly and embarrassing, but most of all, it can be extremely painful. At the first sign of an infection, it’s important to have it treated quickly and correctly. If left untreated, you run the risk of a repeated nail infections—nobody wants that.
Nail Fungus Treatment Mistakes You Don’t Want to Make
With that said, here are some of the most common mistakes that people make when treating nail fungus. Most of these are the result of misinformation and do-it-yourself techniques, avoiding them at all costs will be your best bet for clean, healthy, pain-free fingers and toes.
1. Not getting the proper diagnosis
Unfortunately, nail fungus isn’t always able to be diagnosed by the laymen. There are a number of other afflictions that can resemble fungal nail, but actually are other conditions. For example, nail hardening—one of the key symptoms of nail fungus—can occur from a number of other factors such as excessive rubbing in tight shoes, pressure from other toes, trauma to nails and an immune disease. Be certain that you have a fungal infection before beginning treatment to avoid any mistakes that could result in unnecessary pain and damage to the nail.
2. Using an incorrect treatment method
There are many different ways to treat fungal nail infections and not all of them are appropriate for each condition. That is to say, while a topical fungal nail treatment might work on a mild case, it won’t work on an advanced case. In fact, it could make the infection worse. Always be certain of the severity of your nail fungus before beginning treatments so that you can choose the most effective option, be it oral medication, topical lotions, or laser treatment.
3. Being over-anxious
One of the worst parts about fungal nail infections is that even with the right treatment; it can take a very long time to fully heal. Some people get over-anxious assuming that the healing process should be quicker. This could lead to seeking alternative options that would cancel out your treatments. On the other hand, some results seem quick on the surface so the patient discontinues the treatment, only to find that the nail fungus returns a few weeks later. Remember—always finish the full treatment cycle even if you think the nail fungus is gone. Also, understand that new nails take 9 to 12 months to grow out and that your current nail will never improve—a new one needs to grow in. This happens at a rate of 1 mm per month. Your best approach is to keep a positive outlook and have realistic expectations.
4. Not preventing recurrence
Just like mold in a house, where fungus grows once, it will again if left unchecked. You can’t just treat current nail fungus; you have to prevent it from reoccurring in the future. Establish proactive hygiene habits such as sterilizing your shoes, socks and bathroom on a regular basis, wear slippers in the shower, keep floors and carpets clean and use an anti-fungal cream. Don’t leave anything to chance.
The bottom line is that there are many mistakes you can make when it comes to treating nail fungus, but only one road to success. Consult a foot specialist to make sure that you’re on the right path to treating your nail fungus and live pain and embarrassment free from today forward.
by Q Pro-team | Sep 3, 2013 | 1.1 Resources & Tips, 2.1 Acne Treatment
Hidden triggers of Acne
Acne can appear without notice on your face or other areas of your body. The sudden flare up may leave you wondering – what caused this unwelcomed breakout? The truth is there are many sneaky culprits in our daily life that can contribute to acne, here’s what you need to know:
1. Cosmetics
Acne caused by topical creams, lotions, sunscreen, and hair and make-up products is known as acne cosmetica. Cosmetic products with talc powder or mineral oil tend to clog the pores and cause acne breakouts. Always go for oil-free and non-comedogenic products. It is also very important to carefully remove any makeup and wash away heavy hair care products before heading to bed.
2. Medications
Avoid medications that have steroids, cortisone, hydrocortisone and prednisone, also watch out for those that contain lithium, lithium chloride, and any forms of iodine. Check with your doctor and make sure he’s aware of your conditions and concerns.
3. Mobile Phone
Your cell phone accumulates all kinds of dirt and bacteria throughout the day. When your phone rubs on your skin, the bacteria and friction can aggravate your skin and lead to an acne breakout. Clean your cell phone with alcohol or Clorox a few times a week and if you’re planning on a long chit chat, consider using an earpiece.
4. Dead Skin
Dandruff blizzard? Not fun, dead skin often causes pimples in the scalp. Wash hair with anti-dandruff shampoo and conditioner and avoid rinsing hair with very hot water.
5. Yoga Mat
Communal yoga mats gather dirt and bacteria after being frequently used by people in the yoga studio. When you drip with sweat and rub your face on the mat, the bacteria there may get in contact with your face, clog your pores, and eventually form acne. Always place a clean towel on the mat during your workout, even if you’re using your personal yoga mat.
6. Dairy Products
Dairy products are said to be one of the leading causes of breakouts. If you are prone to acne you should decrease the intake of dairy products such as milk, ice cream, butter and cheeses that are high in fat.
7. Stress
Studies show that stress raises the level of the hormone cortisol, which increases oil production, and leads to bouts of acne or aggravates existing acne. Research also found that college students experience breakouts the most during their exams, when they usually feel most stressed.
To deflate stress, make sure to sleep well, exercise regularly, and allow yourself time to relax or to do something that you enjoy each day.
There are so many other factors that can also contribute to acne outbreaks, for example, many people experience acne as a result of pregnancy or weight gain. Understanding the various causes can help you get to the root of your acne to prevent and control breakouts, or clear away the condition completely with the appropriate treatments or skin care products.
by Sarah Rutland | Aug 15, 2013 | 1.1 Resources & Tips
Layer of Skin
Between deciding which moisturizer to use, what level of sun protection factor (SPF) you need for the beach, or which makeup will best prevent breakouts, it may feel as if your skin is a constant concern. And since it’s your largest organ, it probably should receive the right amount of attention. Taking good care of your skin is important for your overall health and well-being, as it provides a protective shield against external factors that can cause harm. You know that you need to take care of your skin, but what exactly are you protecting? What is your skin made of?
Skin has many components, including water, lipids, proteins, minerals and chemicals. Your skin has basic three layers: the epidermis, the dermis and the subcutaneous fat layer, or hypodermis [source: WebMD].
The epidermis is the outer layer of skin, comprised of translucent cells that produce keratin, a protein that protects you from potentially detrimental factors in the environment. This is the layer of skin that you can actually see and touch. The epidermis is also home to cells that produce melanin, which is the substance that gives skin its color. Overall, your epidermis controls the appearance of your skin and helps to you to retain water [source: Ohio State University Medical Center].
The dermis is the middle layer of skin, which contains two important proteins that contribute to the skin’s strength and texture: elastin and collagen. These two proteins keep your skin from wrinkling and sagging, but they break down with age, which is why you may recognize them from anti-aging product advertisements. The dermis also contains nerves, blood vessels, hair follicles and sweat glands. When you feel pain after you cut yourself, it’s because of the nerves and receptors in the dermis.
Finally, there’s the subcutaneous layer of skin, made up of fat and collagen cells. This layer helps you retain heat, and it also absorbs shock and protects your internal organs from injury. If tissue in this layer begins to deteriorate, your skin may start to sag.
by Q Pro-team | Jul 26, 2013 | 1.1 Resources & Tips, 2.1 Acne Treatment
4 Best Home Remedies for Acne Treatment
Are you looking for all-natural home remedies to cure your acne fast? If so, you’ve made the right decision. Many over-the-counter creams and medicines don’t really work—if they did, you wouldn’t see people walking around with pimples! The problem is our diets and lack of healthy practices for our bodies and skin cause acne and once it’s there, it’s super-hard to get rid of. Thankfully, there are home remedies for acne that are quite effective.
Let’s see what acne-fighting alternatives Mother Nature has to offer that can help get rid of your acne for good.
The Four Best Home Remedies for Acne
We’ve put together the four most effective (and 100% natural) ways to get rid of your acne at home:
1. Baking Soda
Baking soda is used for acne by making a mask that cleanses and reinvigorates the skin. Not only that, but the baking soda will reduce inflammation around your existing acne and your dead skin cells will be exfoliated. This is a key step in good skin health and vital to maintaining an acne-free complexion. Further, thanks to the powerful exfoliation benefits of baking soda, existing pock marks and acne scars are reduced as well.
To get started, simply place three teaspoons of baking soda in 1/2 cup warm water and mix until it becomes a paste. If it’s too watery, add more baking soda—too thick, add more water. Then, apply the baking soda paste to your face and let it sit for about 15 minutes at first. Over time, you can build up to leaving this baking soda acne mask on overnight, but remove it at the first sign of discomfort. You should start to see results in a few days.
2. Egg Whites
When most people hear egg whites, they think of healthy omelets. When it comes to egg whites for acne and your skin, you don’t eat them, but rather use them to make a facial mask. Egg whites contain oil reducers that draw out impurities from your skin and then contracts your pores to make sure they close up afterward. This means that dirt, makeup, sweat and other pore-clogging debris has a harder time getting back into your skin, resulting in less acne.
To use egg white masks for pimples, simply crack the egg in half and separate the yolk from the clear part (the egg white). Then, apply the egg white with a cotton ball to the affected areas and after a few minutes, you’ll feel your skin tighten up—this is a good thing. You can leave this home acne remedy mask on for about thirty minutes, wash it off, and enjoy the immediate glow your skin takes on.
3. Honey
Honey is another great moisturizer for your skin that contains antiseptic properties which works extremely well on acne. For an added effect, mix nutmeg with some honey to create a facial mask and apply it to your skin for thirty minutes each day. For severe acne, you can do this once in the morning and once at night.
After the time is up, rinse the mask off with warm water and then cold water, since honey is pretty sticky. Within a few days, you’ll see amazing results and have soft, smooth skin straight from nature.
4. Eating foods that are rich in Vitamin B5
Our final home remedy for acne is more of a lifestyle adjustment that changes the environment that acne thrives in. While the rest of the home care tips for pimples we’ve given have stayed on the surface of your skin, this will help attack the problem from the inside out. After all, acne comes from underneath your skin, not above it.
Vitamin B5 is called Pantothenic Acid and can be found in eggs, bananas, oranges, whole grain breads and products, poultry, meat, fish, seeds and mushrooms.
by Roy G. Geronemus Galen H. Fisher | Jun 24, 2013 | 1.1 Resources & Tips, 2.2 Scar Treatment
Causes of Hypopigmentation
Mature scars often appear hypopigmented compared to surrounding normal skin. The most common explanation of the hypopigmentation is that the areas affected have decreased melanocyte numbers compared to the surrounding skin. However, recent immunohisto-chemical analyses by Velangi et al demonstrated preservation of epidermal melanocytes within scar tissue. Their findings raise the possibility that hypopigmentation of scars may not simply be due to a decrease in melanocyte number but rather an optical effect due to alterations in collagen and microvasculature. These studies also laid the theoretical foundation for using lasers and phototherapy devices to repigment scars.
by Q Pro-team | Jun 7, 2013 | 1.1 Resources & Tips
Exciting New Discovery Could Rejuvenate Your Skin
It’s well known that some reptiles, like salamanders, are able to regenerate a great number of their body structures such as limbs, tails, jaws, and even parts of their organs such as the heart, brain and spinal cord. Recently, a team of Australian researchers including Dr. Godwin discovered that the white blood cells called macrophages play a key role in this muscle regeneration.
Where it gets interesting, is that macrophages also exist in the human body. The term, which means ‘big eaters’ refers to the cells ability to eat up dead cells and germs within the body, thus helping our muscles to repair and grow. Earlier studies have also revealed that stimulating macrophages can help the synthesis of collagen in our skin, which leads to optimal results in skin rejuvenation.
While it might still be too early for scientists to determine how we can regenerate complete arms or legs as salamanders do, they may be able to let people heal wounds without forming visible scars, or make more advanced anti-aging products in the very near future.
by Denise Stern | May 25, 2013 | 1.1 Resources & Tips, 2.8 Skin Tightening
Chin Workout
Many individuals exercise every day but forget one important body area — the face and neck. Exercising your chin tones the muscles of your lower face, your jawline and your neck for a more youthful appearance. Exercise the muscles of your lower face and chin on a daily basis and you may benefit from the natural facelift results that you could begin to see in a matter of weeks.
Chin Lifts
The chin lift exercises multiple small muscles that make up the lower portion of the face, including the hyoglossus, the mylohyoid and the platysma, the large muscle flap that extends from your chin down along the front of your throat. Toning these muscles purportedly slims the front part of the neck and chin where they join. Start with your head and neck in a relaxed position. Tilt your head backward until the chin points upward to the ceiling. Push your chin forward. You’ll feel a strong pull all along the jawline and front of the neck. Hold the position for 10 seconds. Lower your chin and repeat the exercise sequence 20 times.
Double Chin
Get rid of your double chin by performing focused exercises in the front of the neck area. One example of an effective exercise is to do what is called kissing the ceiling. Tilt your head back and purse your lips in an exaggerated kissing position. Extend the lips toward the ceiling and hold a second, then release. Continue repeating the kissing motion 10 to 20 times. You can do this exercise several times a day.
Yoga Lion Pose
The lion pose helps tone and exercise all the muscles of the face, but also targets the lower jaw, chin and neckline. Kneel on the floor, hands on your thighs. Open your eyes and mouth as wide as you can and stick your tongue out, trying to touch your tongue to your chin. Hold this position while saying “ah” for five to 10 seconds to start. Release the pose. Relax a moment and then repeat. You can do this exercise as often as you wish through the day.
Hanging Head Lift
Lie on a sofa or bed with your head hanging over the edge. Lift your chin toward your chest. Place a hand behind your head to help if needed until your neck and jaw muscles grow stronger. Hold the contraction for a few seconds and then slowly lower your head back to its starting position. Repeat five more times and then relax.
by Q Pro-team | May 6, 2013 | 1.1 Resources & Tips
How Hyperpigmentation Is Formed
Hyperpigmentation is a harmless skin condition triggered by an overproduction of melanin which causes the skin to appear darker. Melanin is responsible for producing the pigment that determines eye, hair and skin colour; it is a dark-brown pigment that is a natural filter from UV rays. Melanocytes, found in the bottom layer of the skin’s epidermis, are the cells responsible for the production of melanin. The pigmentation process encompasses 3 major stages:
1. Melanin is created when tyrosinase, an enzyme naturally found in the body, converts tyrosine into melanin.
2. Melanin is then held in melanosomes which start to migrate to the surface of the skin.
3. Once the melanosomes are mature they are transferred to keratinocytes, and are then moved to the surface of the skin.
Hyperpigmentation such as melasma, age spots and uneven skin tone can add an average 10 to 15 years to woman’s perceived age. Fortunately, in most cases, the appearance of hyperpigmentation can be improved dramatically by chemical peeling, photorejuvenation or fractional laser resurfacing.
by Allergan | Apr 20, 2013 | 1.1 Resources & Tips, 4.1 Cosmetic Injections and Fillers
Soft Lift with Botox and Juvederm
Soft Lift treatment refreshes your appearance with Botox Cosmetic and Juvederm facial filler.
30s — a refreshed new glow
lines around eyes and forehead relaxed with Botox Cosmetic
smile lines smoothed with Juvederm
jaw contoured and lips enhanced with Juvederrn
40s — looking refreshed and relaxed
forehead lines, frown lines and crow’s feet relaxed with Botox Cosmetic®
smile lines and marionette lines filled in with Juvederm
lip and cheek volume enhanced with Juvederm
jawline contoured with Juvederm
50s — a revitalized appearance
forehead lines and crow’s feet relaxed with Botox Cosmetic®
smile lines and marionette lines softened with Juvederm
cheeks enhanced and jawline contoured with Juvederm
60s — replenished and renewed
forehead lines and crow’s feet relaxed with Botox Cosmetic®
cheeks and lips enhanced with Juvederm
smile lines softened and jawline contoured with Juvederm
Soft Lift — a customized cosmetic treatment that gives you a balanced, nutural-looking makeoover, with no downtime!